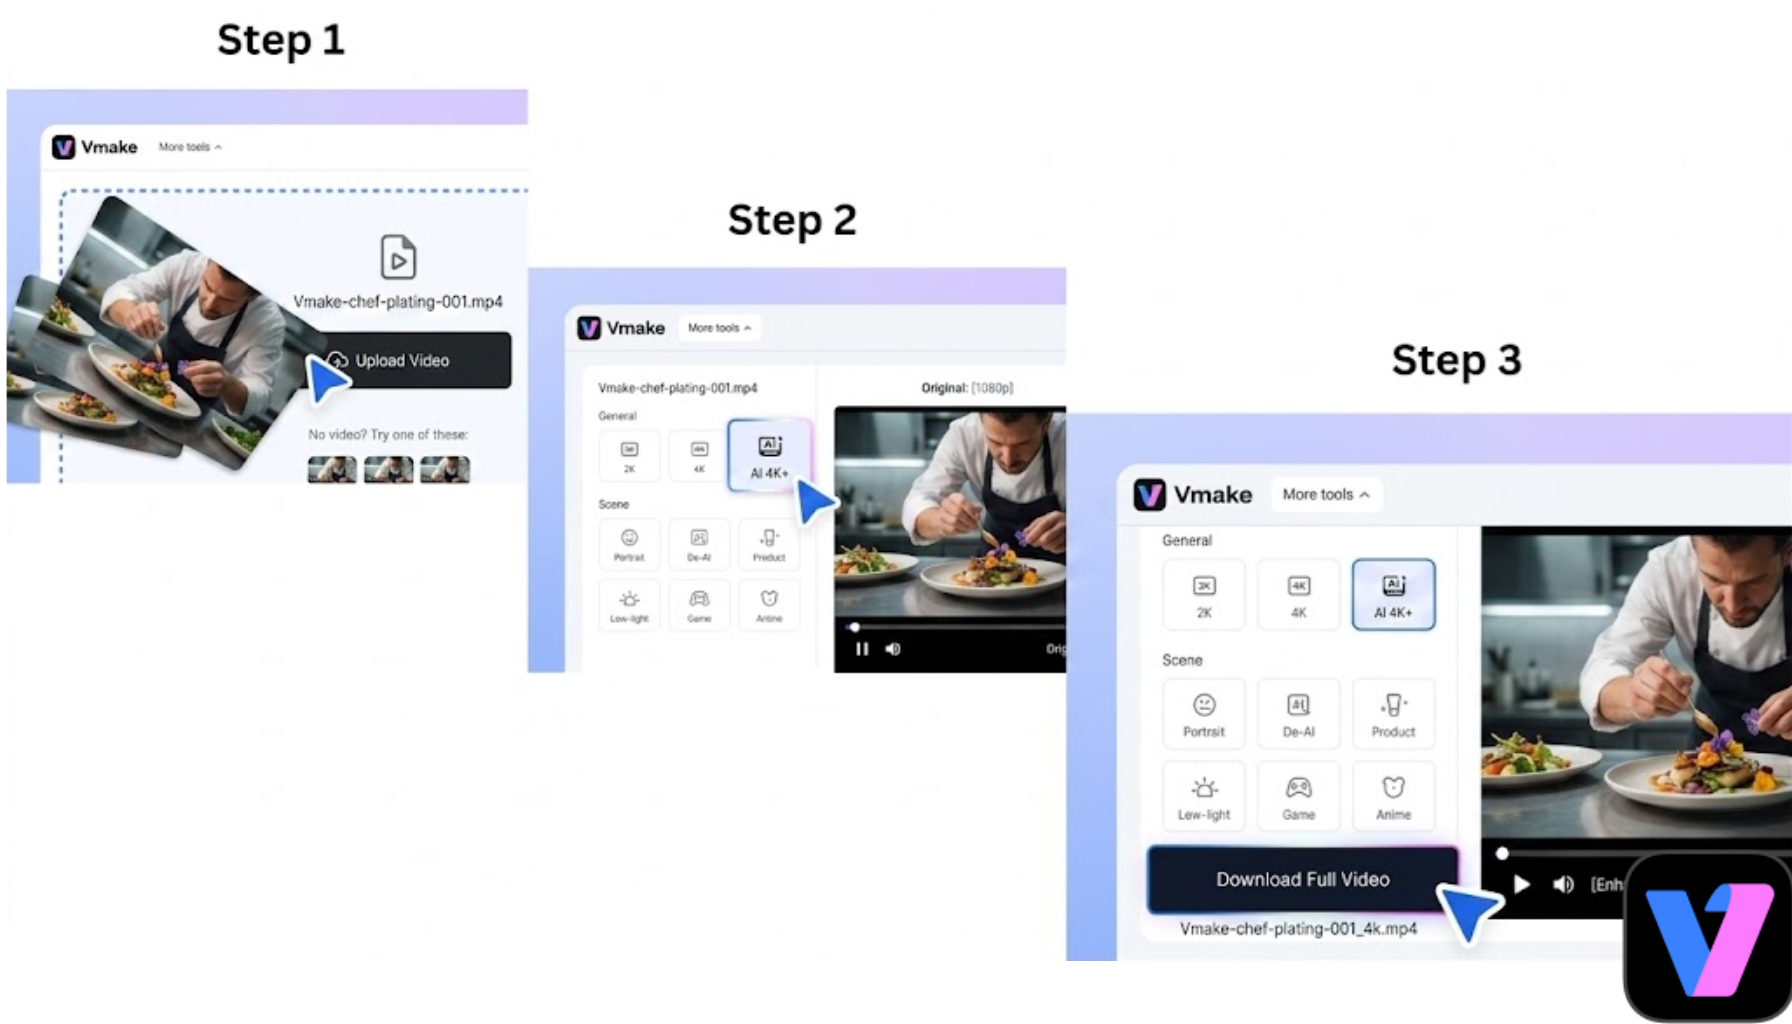
If you have ever spent 40 minutes installing a desktop video enhancer, updated your GPU drivers, waited for a model to download, and then watched your export queue crawl through a 90-second clip, you would already appreciate the appeal of the Vmake tool.
Vmake opens in a browser tab. You upload a video. It processes in the cloud. Done.
But does this “lite” cloud-first approach actually deliver the restoration quality required for professional use?
With the industry moving away from perpetual licenses and toward rigid subscription tiers, we’ve put Vmake to the test to see if it stands up to the heavy hitters. Is a monthly fee of $9.99 a bargain for this level of accessibility, or are you paying for convenience at the expense of true cinematic output? Let’s see.
What Is Vmake? Vmake is a browser-based AI video platform built for content creators, small business owners, marketers, and e-commerce sellers who want professional-looking output without a production pipeline.
Unlike desktop tools, Vmake requires no installation, no dedicated graphics card, and no local processing power. Everything runs in the cloud, which means you can upload footage, start processing, and download the final result from almost any modern device.
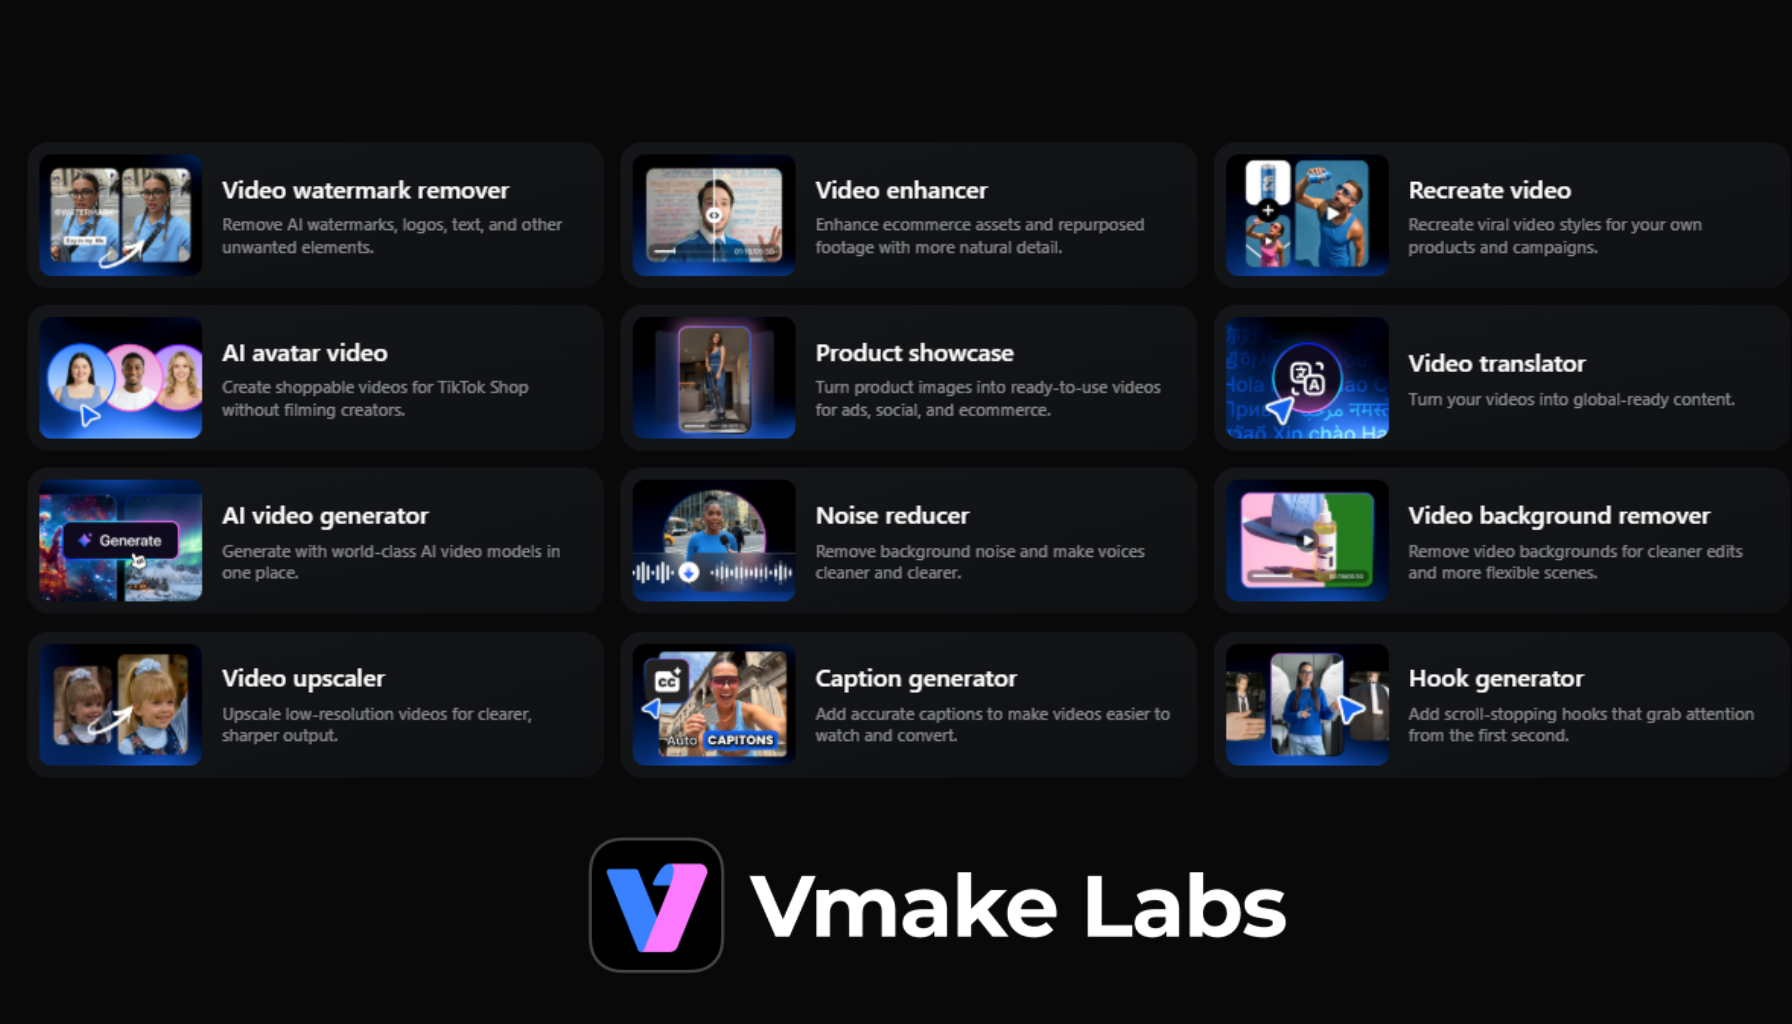
Some of its most popular Vmake’s features include:
- Video enhancement
- Watermark removal
- Background removal
- Video translation
- AI-generated avatars
- Product video creation
- Image enhancement tools
The enhancement side of the platform is what makes Vmake genuinely interesting in 2026, so that’s where most of this review focuses. While the content creation tools are useful additions, the AI video enhancement models remain the main reason most users sign up in the first place.
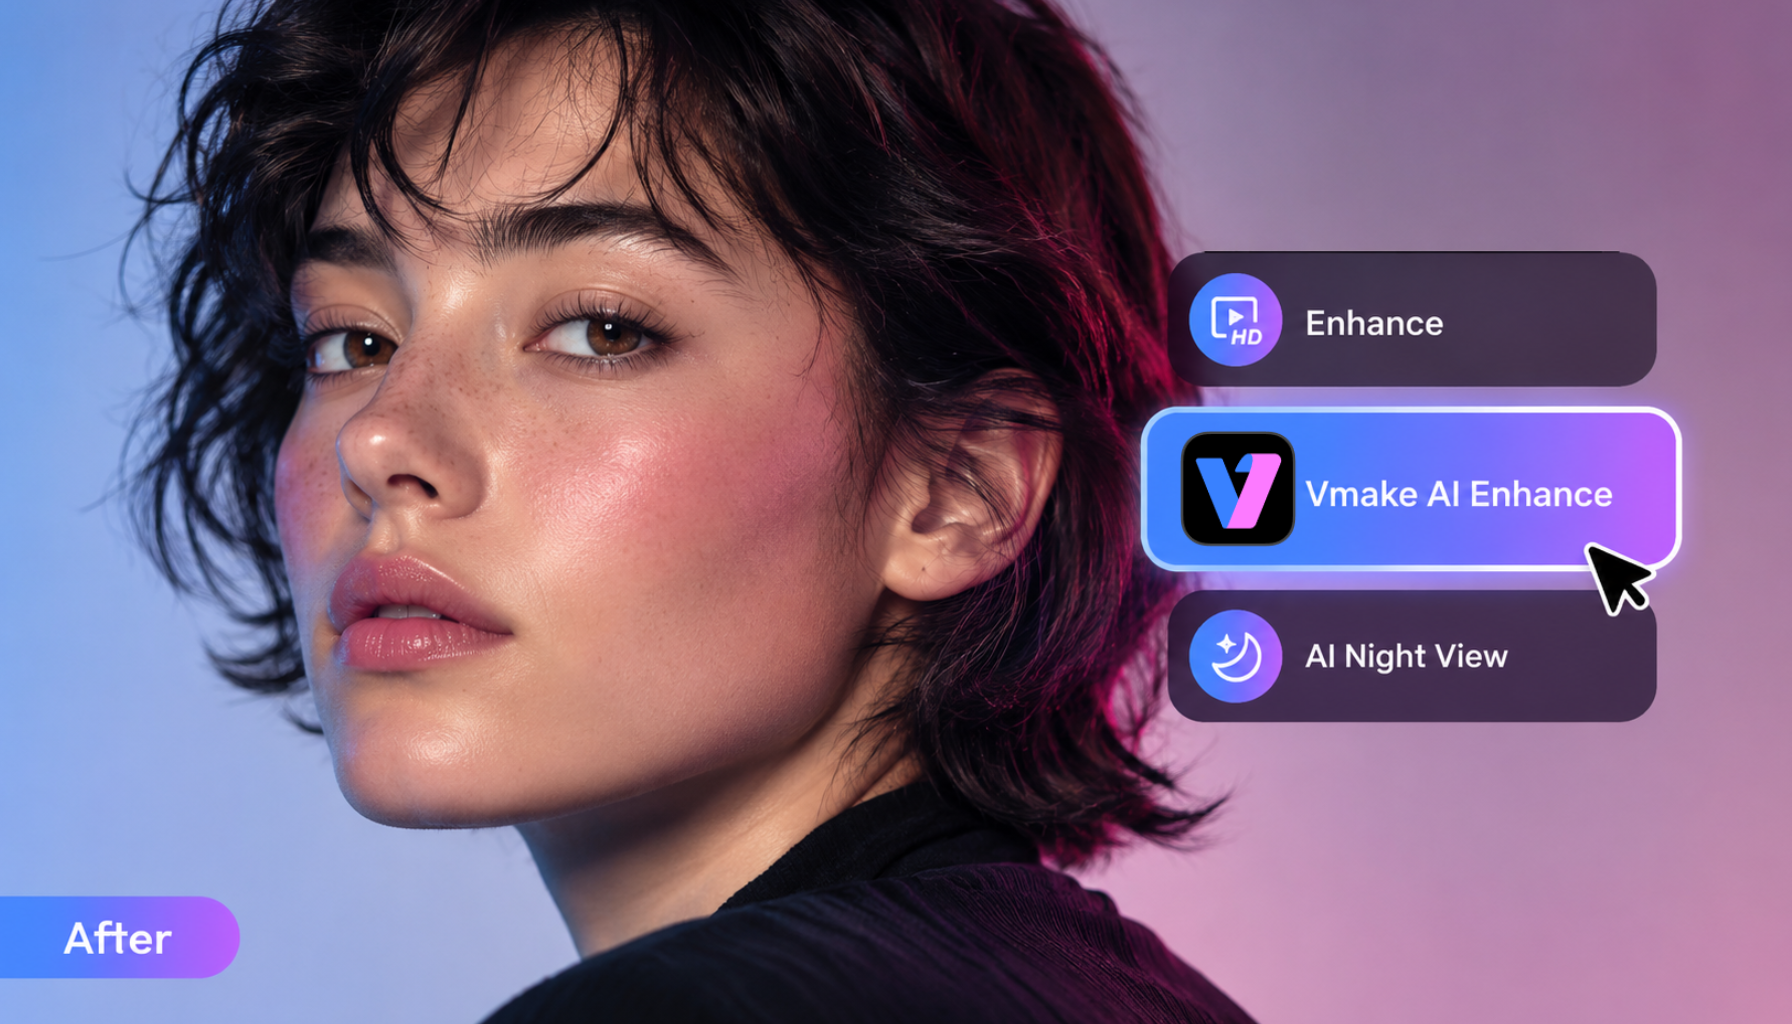
AI Video Enhancer with 7+ AI Modes
 The centerpiece of the platform is Vmake’s AI video enhancer, designed to improve clarity, sharpness, and overall visual quality of a video. It targets common problems found in everyday footage:
- Low-resolution clips
- Compressed social media videos
- Slightly blurred recordings
- Older camera footage
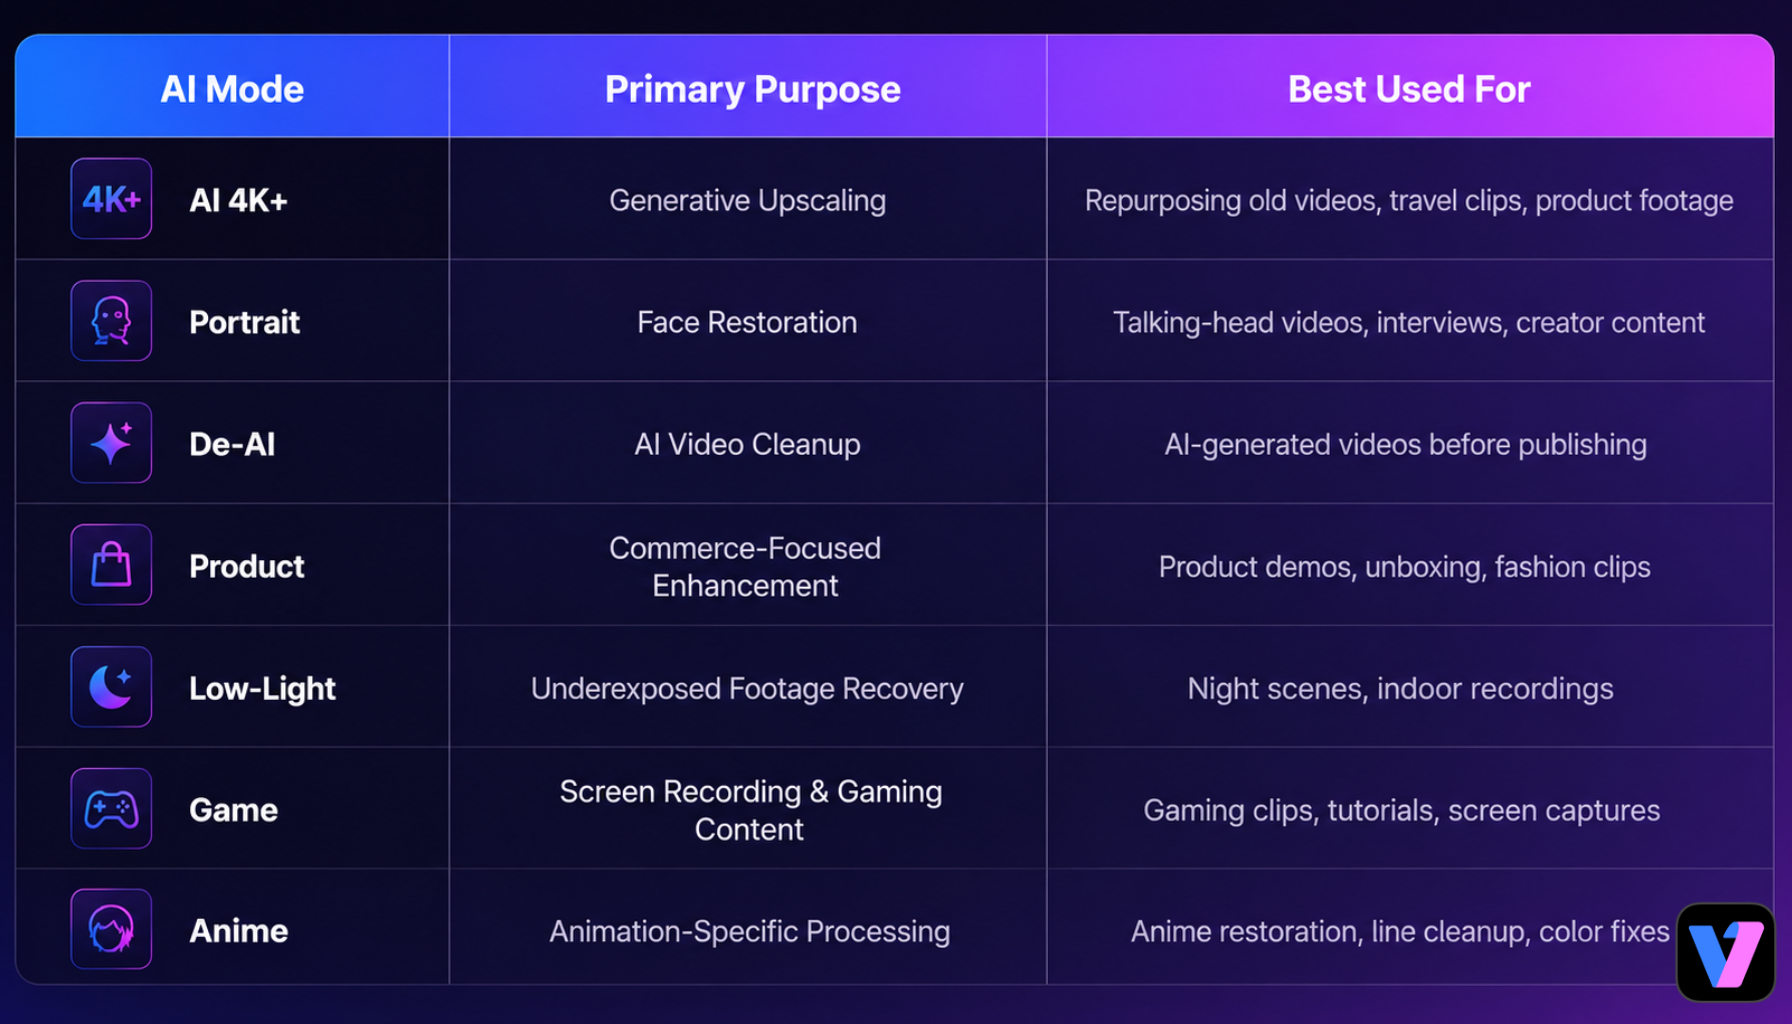
Instead of relying on a single enhancement model for every clip, Vmake provides multiple AI modes that target different types of footage and restoration challenges.
We ran footage through every mode during testing, and the difference between routing a talking-head clip through Portrait versus the standard AI 4K+ pass is genuinely visible at full resolution.
 Here’s what each mode actually does and where it earns its place.
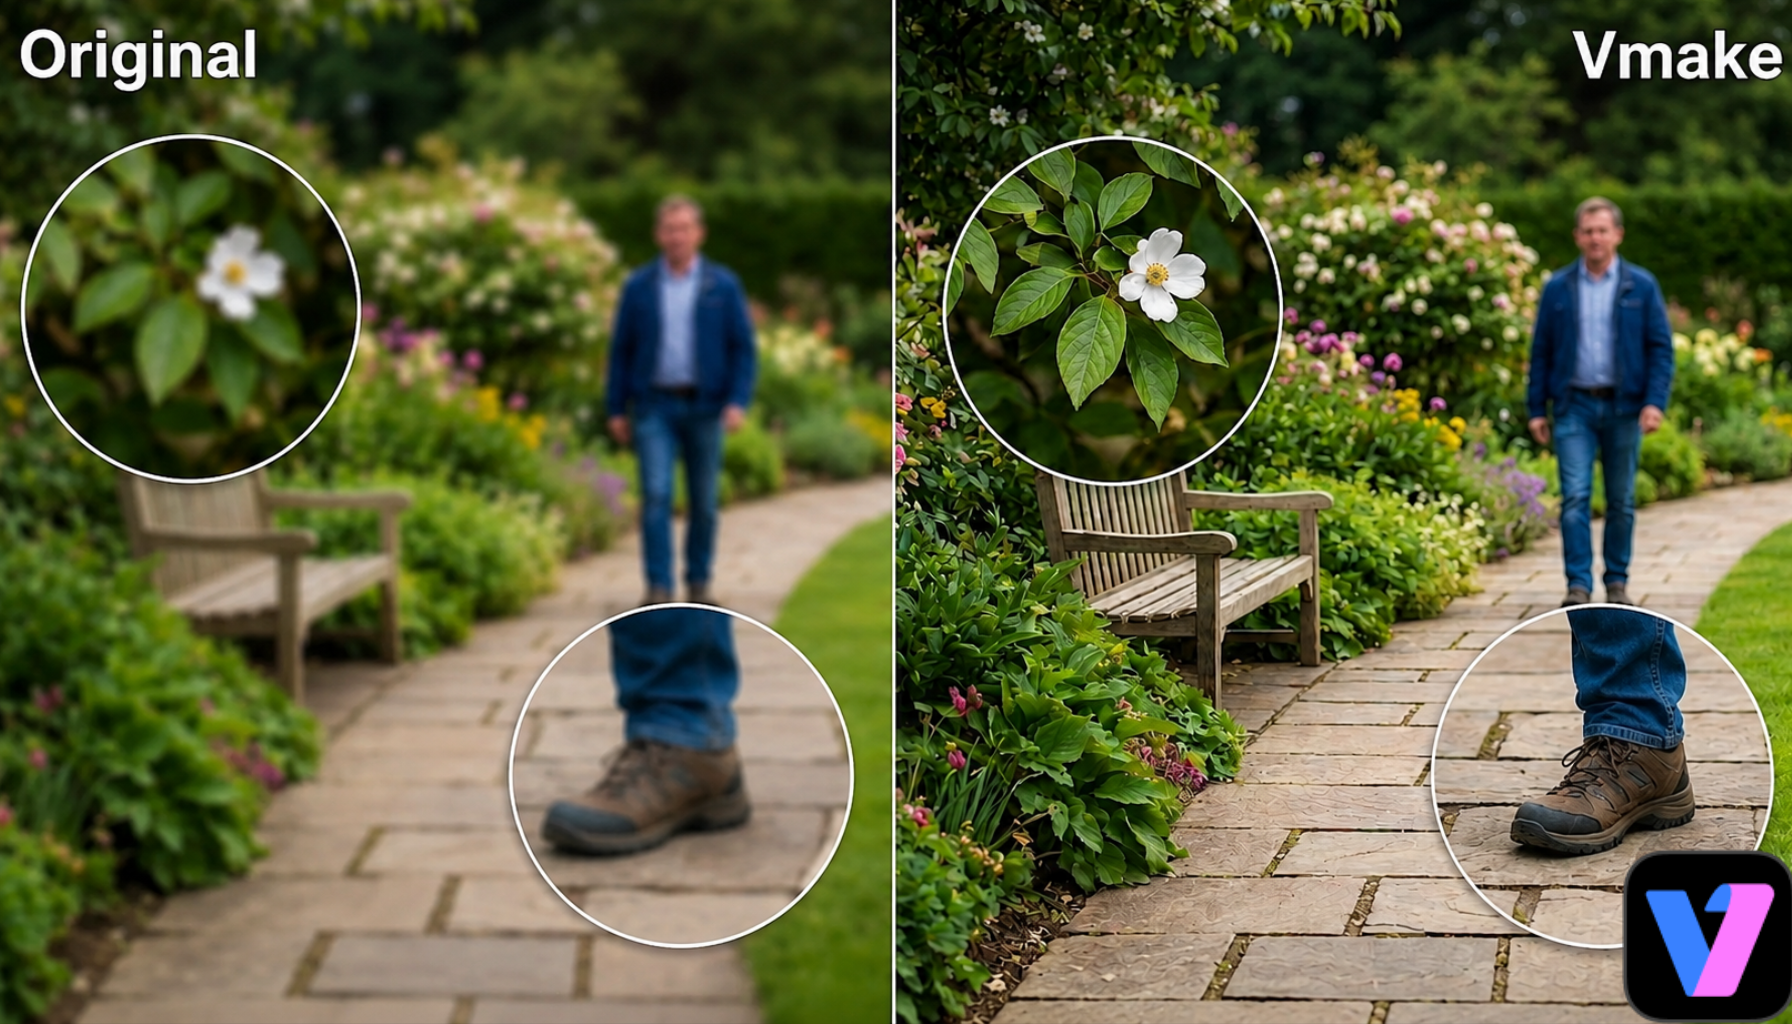
1. AI 4K+ Mode
AI 4K+ is the foundation you build everything else on. Instead of stretching pixels, it reconstructs content generatively, filling in texture, edge detail, and depth that compression or low resolution had removed. On a test with heavily compressed footage, the result was noticeably cleaner than what 4K upscaling alone produces.
The catch: AI 4K+ is capped at 5 seconds on the free tier, so any serious testing requires a paid plan.
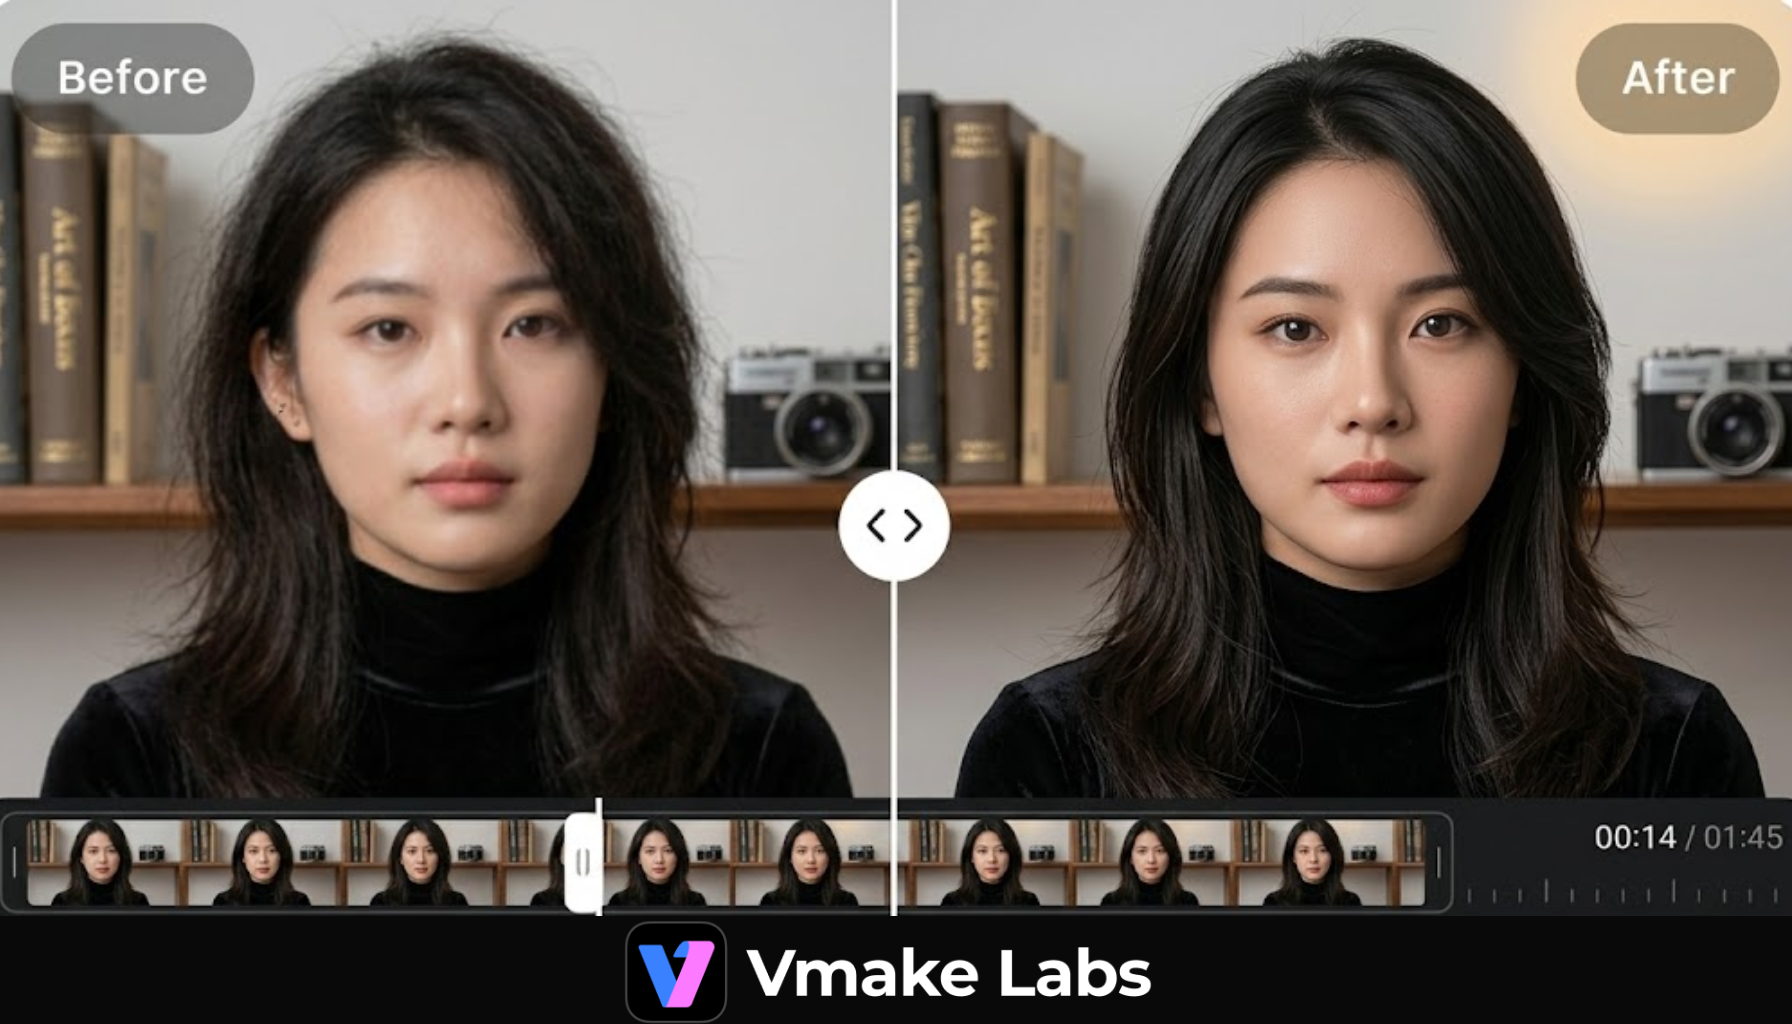
 2. Portrait Restoration Mode
Portrait Restoration is the model we reached for most often during testing. Skin texture came back without looking plastic, hair detail sharpened without the crunchy edge halos you see from over-sharpening, and facial jitter between frames settled down considerably.
It handled one low-light indoor portrait clip better than we expected, recovering enough shadow detail in the face to make the footage actually usable.
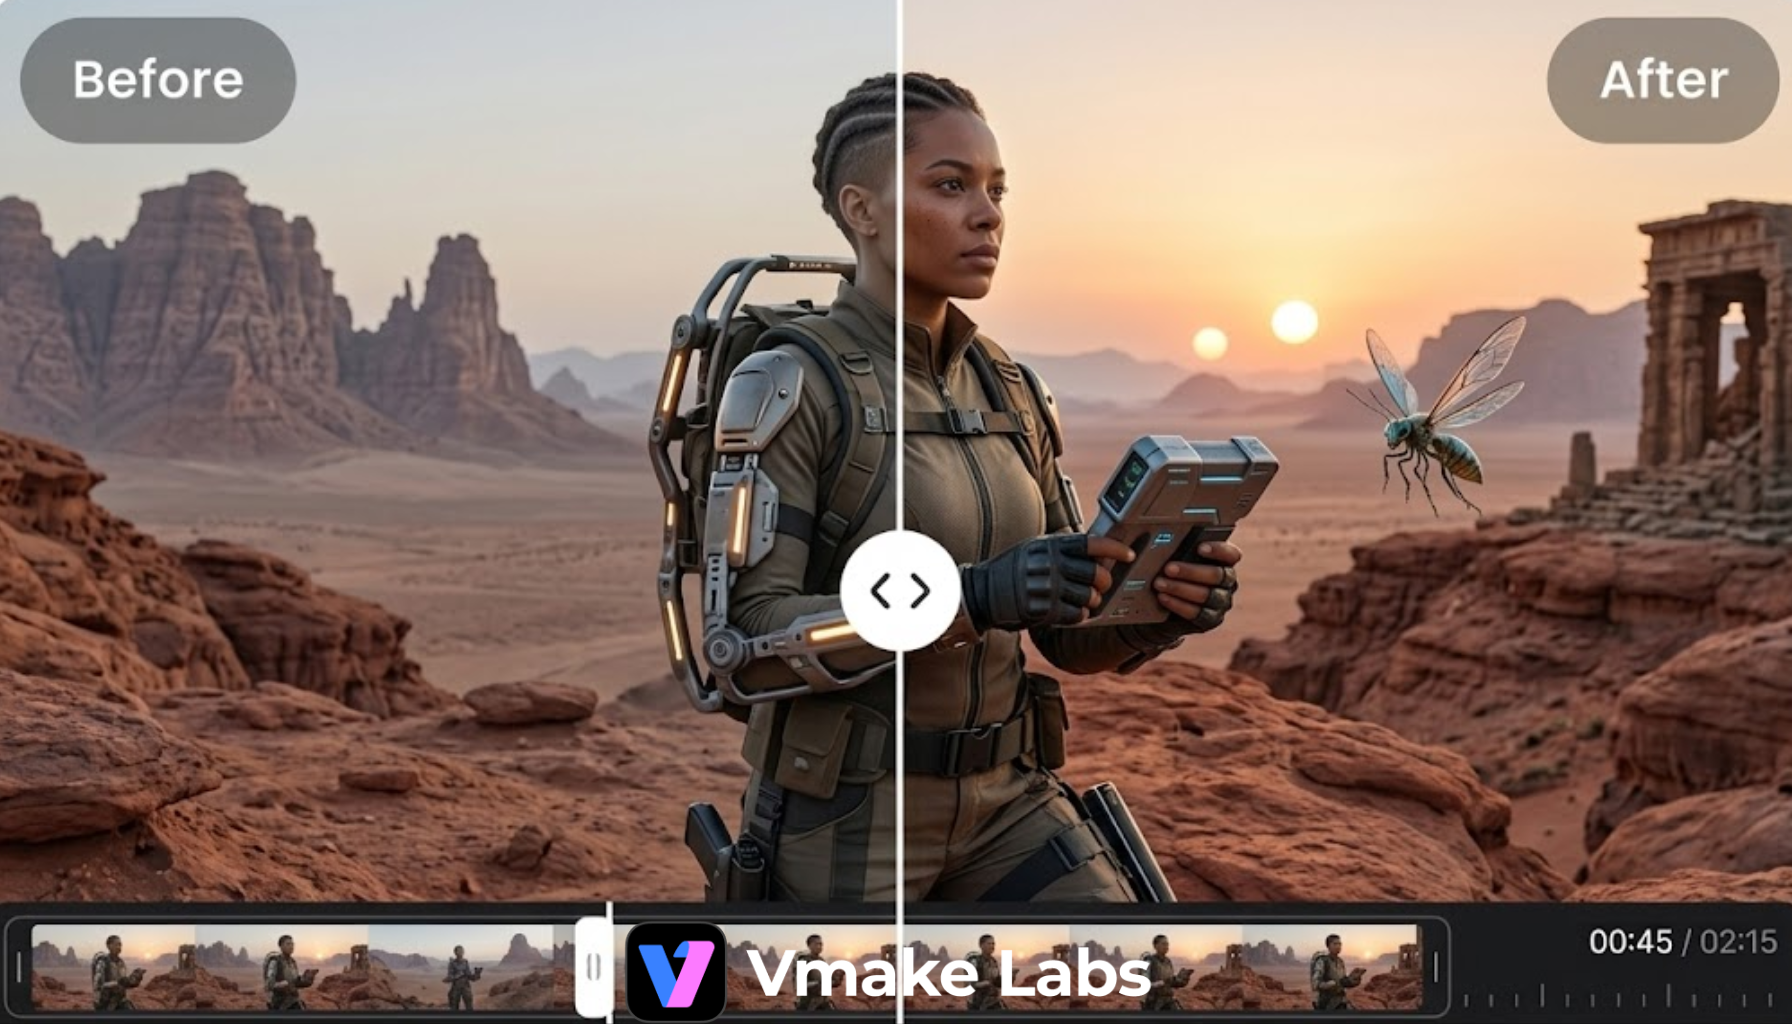
 3. De-AI Mode
This mode is the one that surprised us most. We fed it a few clips generated with Kling and Sora, the kind of footage that has that telltale smooth, textureless look, and the mode made a real dent in that artificial quality.
Color balance improved, repeated surface textures were broken up, and the overall result felt closer to camera-shot footage than it did going in. It won’t fool a trained eye on every frame, but for social-first content it clears the bar.
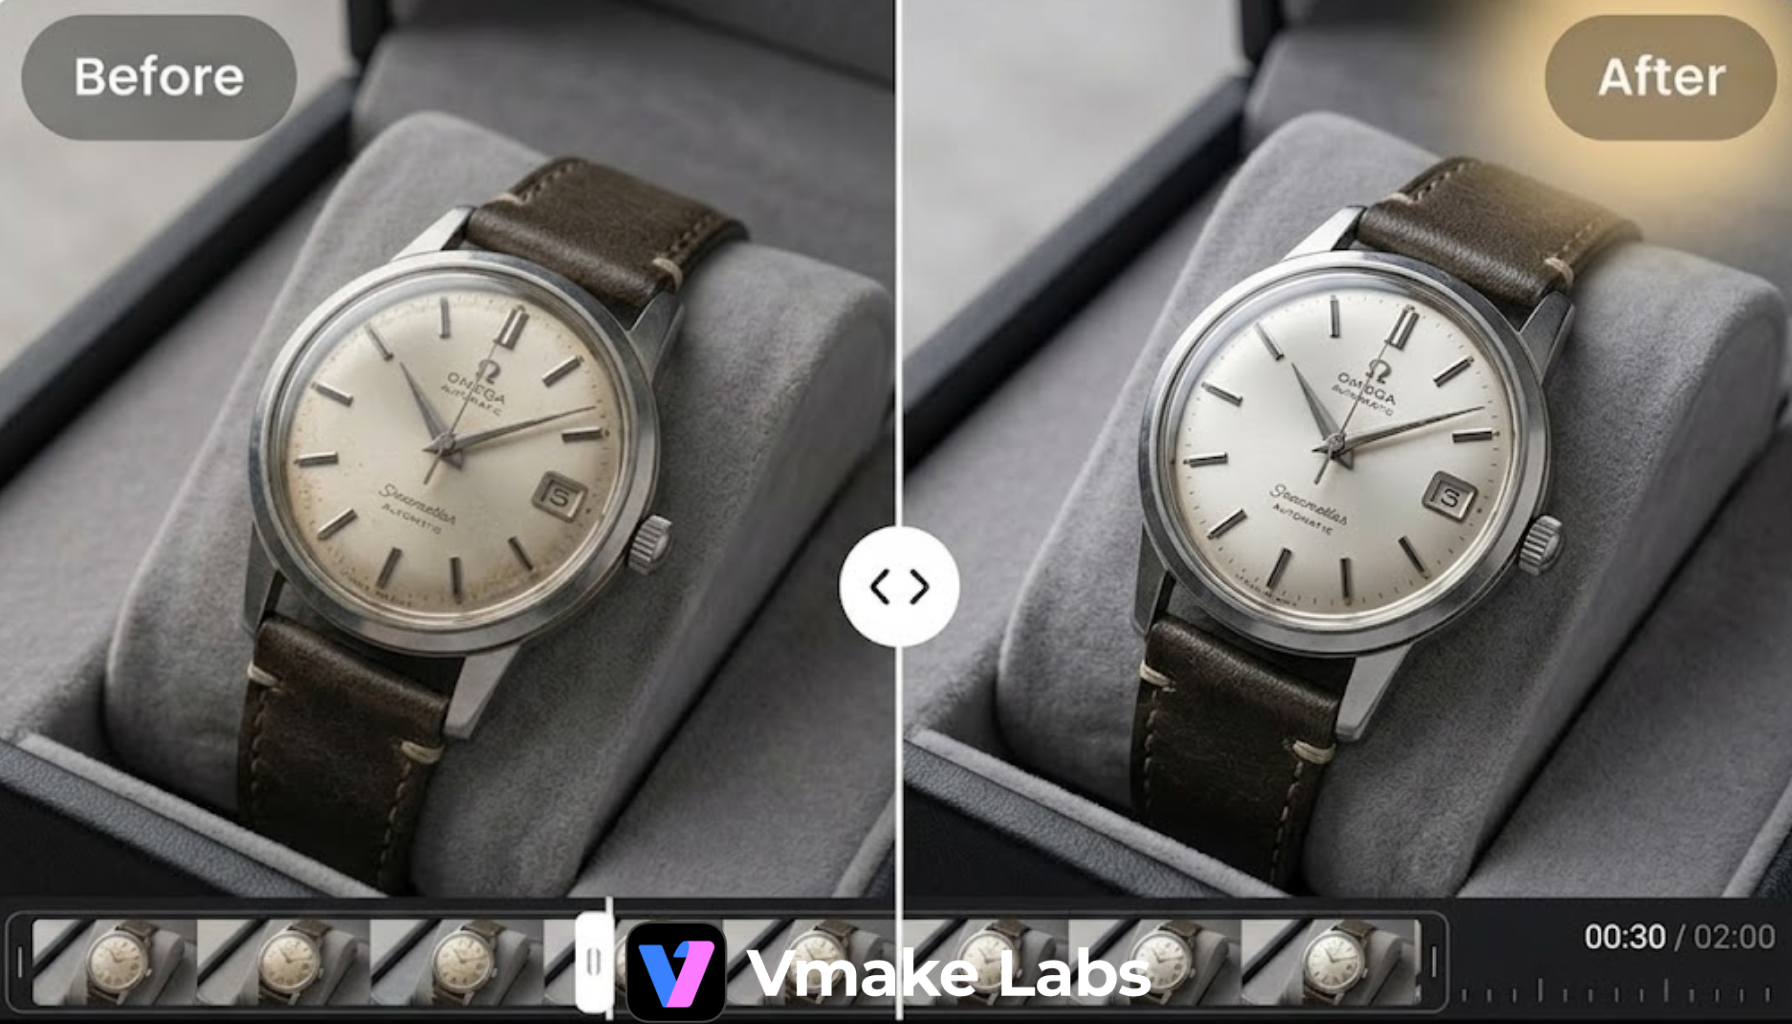
 4. Product Enhancement Mode
This mode is clearly aimed at e-commerce sellers and product marketers. During testing, we used a watch product video and saw noticeable improvements in detail across the entire clip. Small elements such as dial markings, bezel edges, and engraved text became easier to see after processing.
Metal surfaces looked more defined, while reflections appeared cleaner and less muddy. Those improvements are valuable when potential buyers are closely examining a product before making a purchase.
 5. Low-Light & Night Repair Mode
Low-Light & Night Repair handled noise and flicker better than the other modes when applied to dim footage, though it struggled on one particularly underexposed clip where the shadow detail was too far gone to recover cleanly. It boosted visibility without blowing out light, which is harder to get right than it sounds.
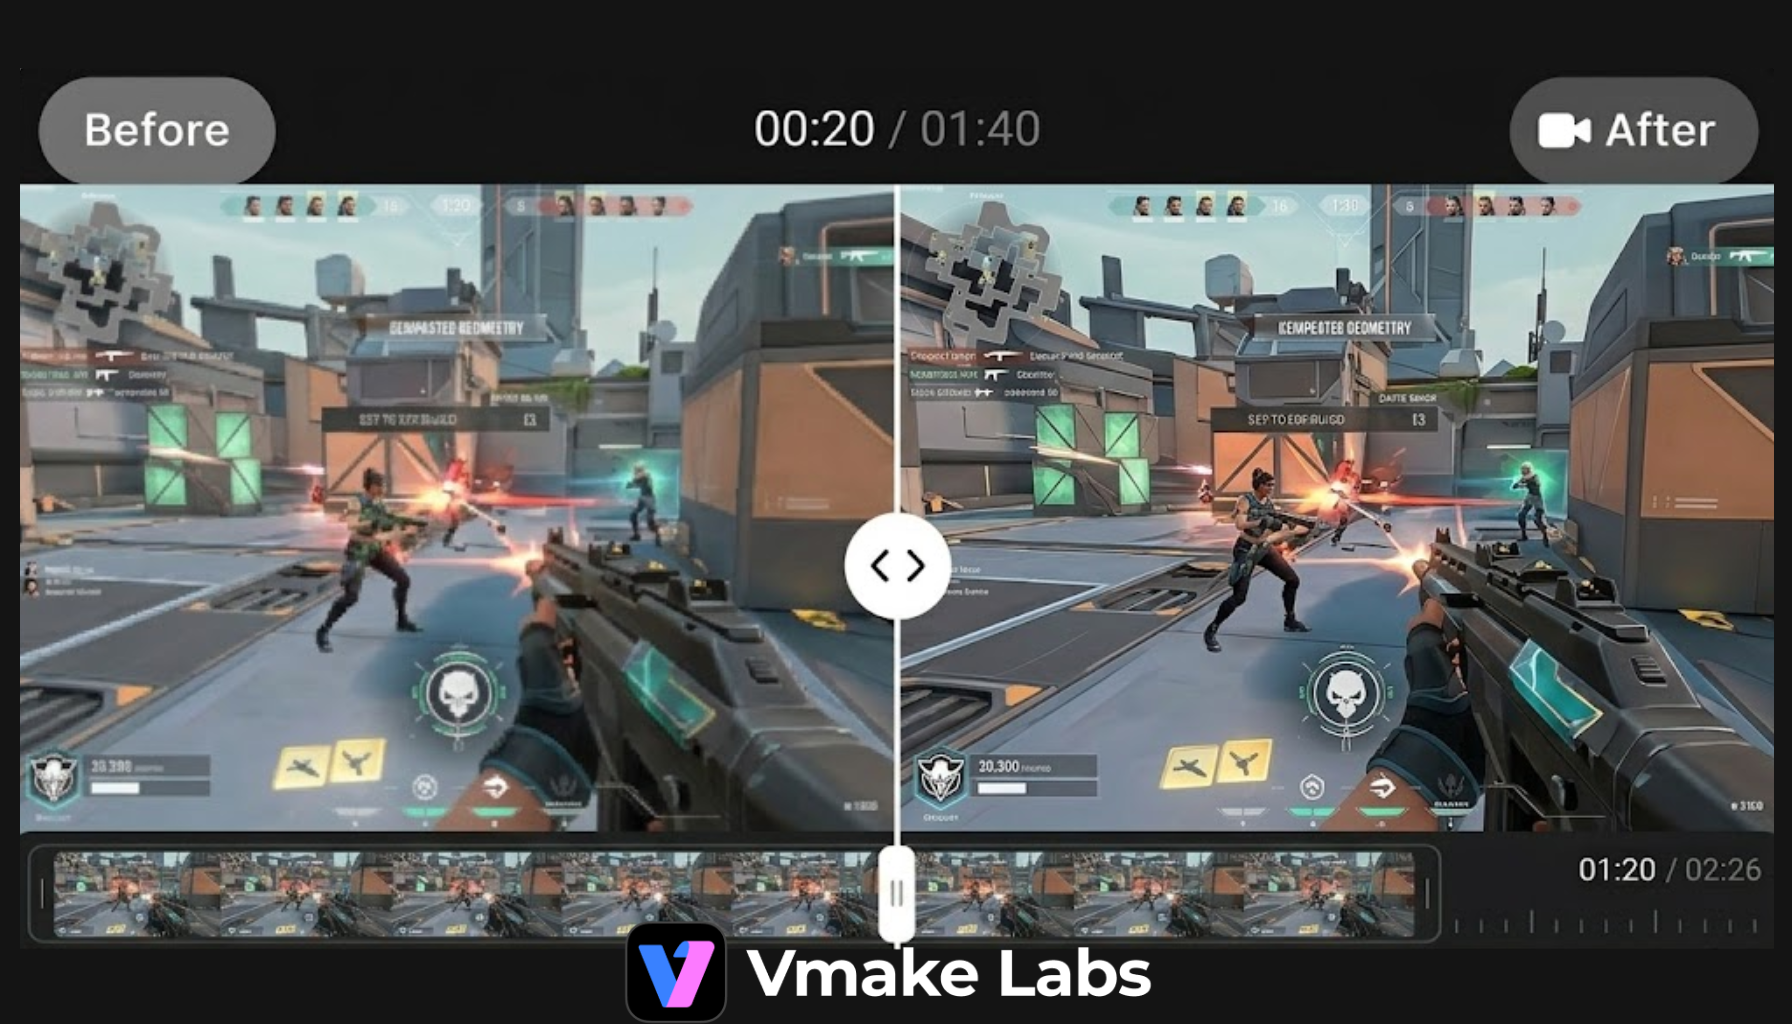
 6. Gameplay & Screen Recordings Mode
We ran a few gameplay captures through this mode, and the difference showed up mostly in the UI elements. HUD text that usually looks jagged or slightly blurred came back sharper, especially during fast movement. Health bars, minimaps, and subtitles stayed more stable frame to frame, which is where most screen recordings usually fall apart.
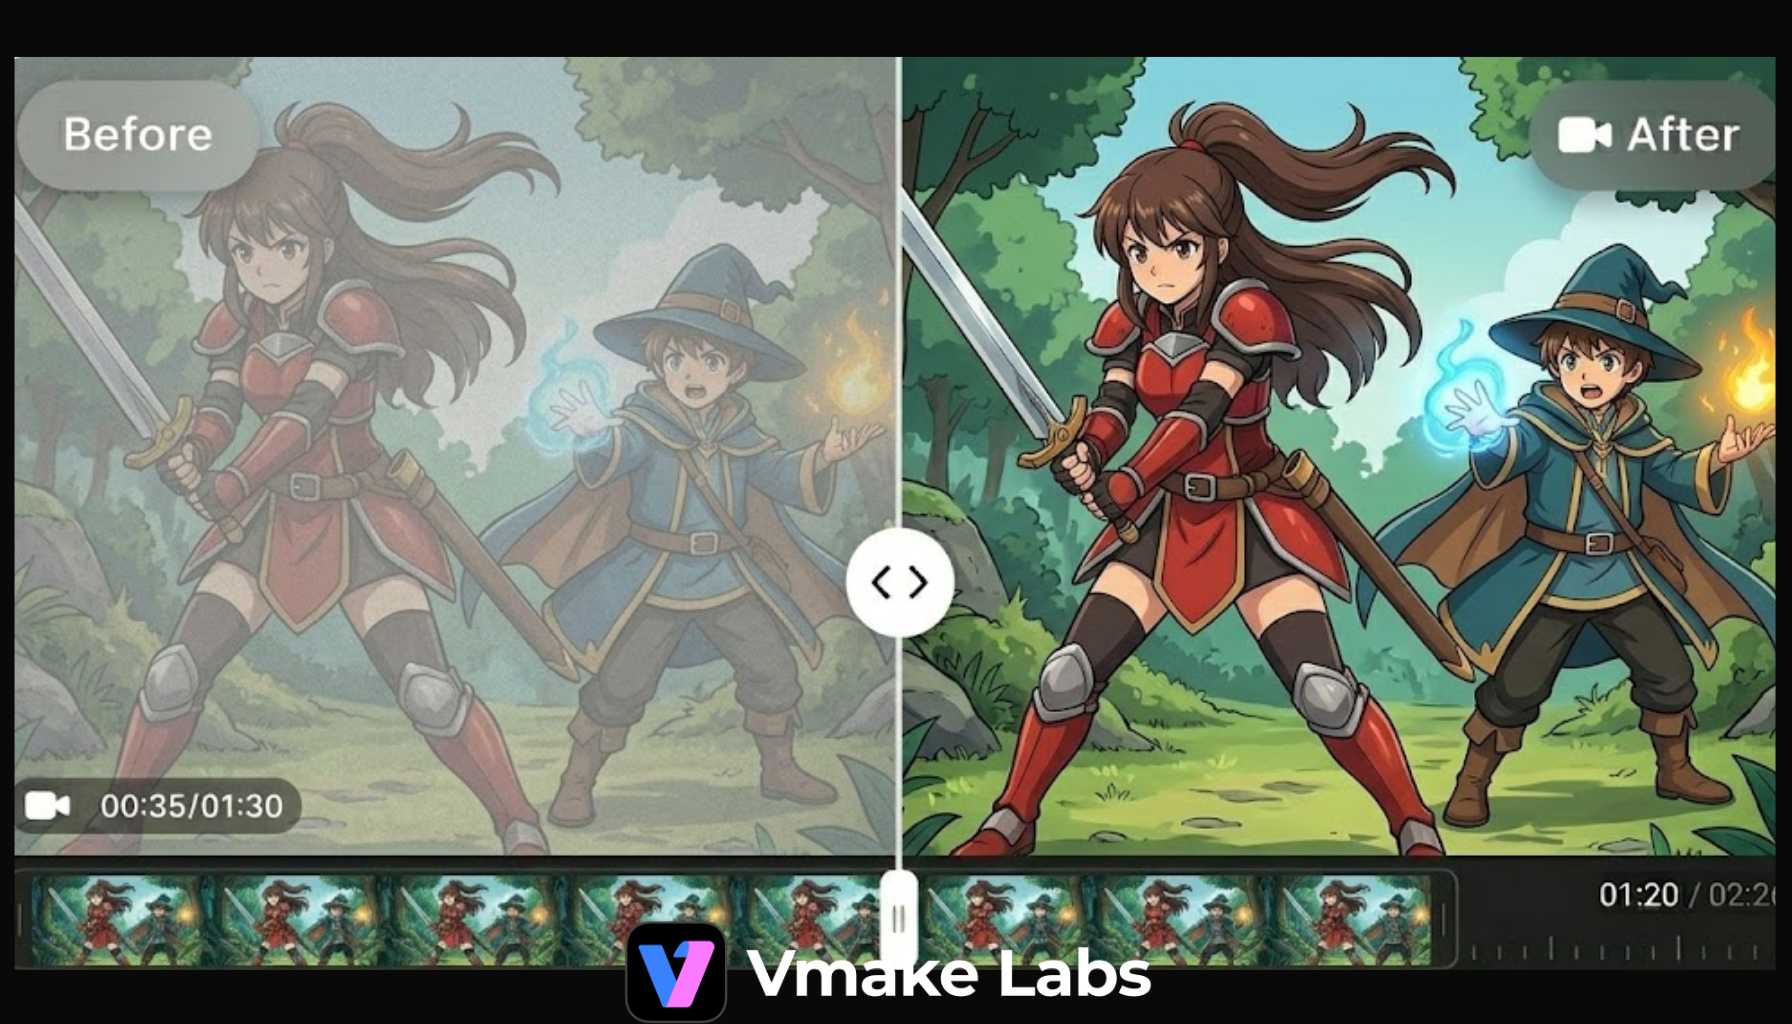
 7. Anime & Animation Mode
Animated content tends to lose its clean structure once compression kicks in. Lines soften, colors bleed into each other, and the original style starts to feel off. This mode focuses on restoring that structure.
During testing, linework became more defined without adding grain or film-like texture that doesn’t belong in animation. Color areas also stayed flat but cleaner, which keeps the original look intact while removing the dullness that comes from repeated compression or low-quality uploads.
 Vmake Watermark Remover: Core Editing Tool
The video watermark remover is the second major feature inside Vmake. We went in expecting a basic logo eraser. What Vmake actually ships here is closer to a full-frame cleanup suite, covering five distinct removal categories that each solve a different problem. None of them required us to touch a single frame manually.
1. Remove Text
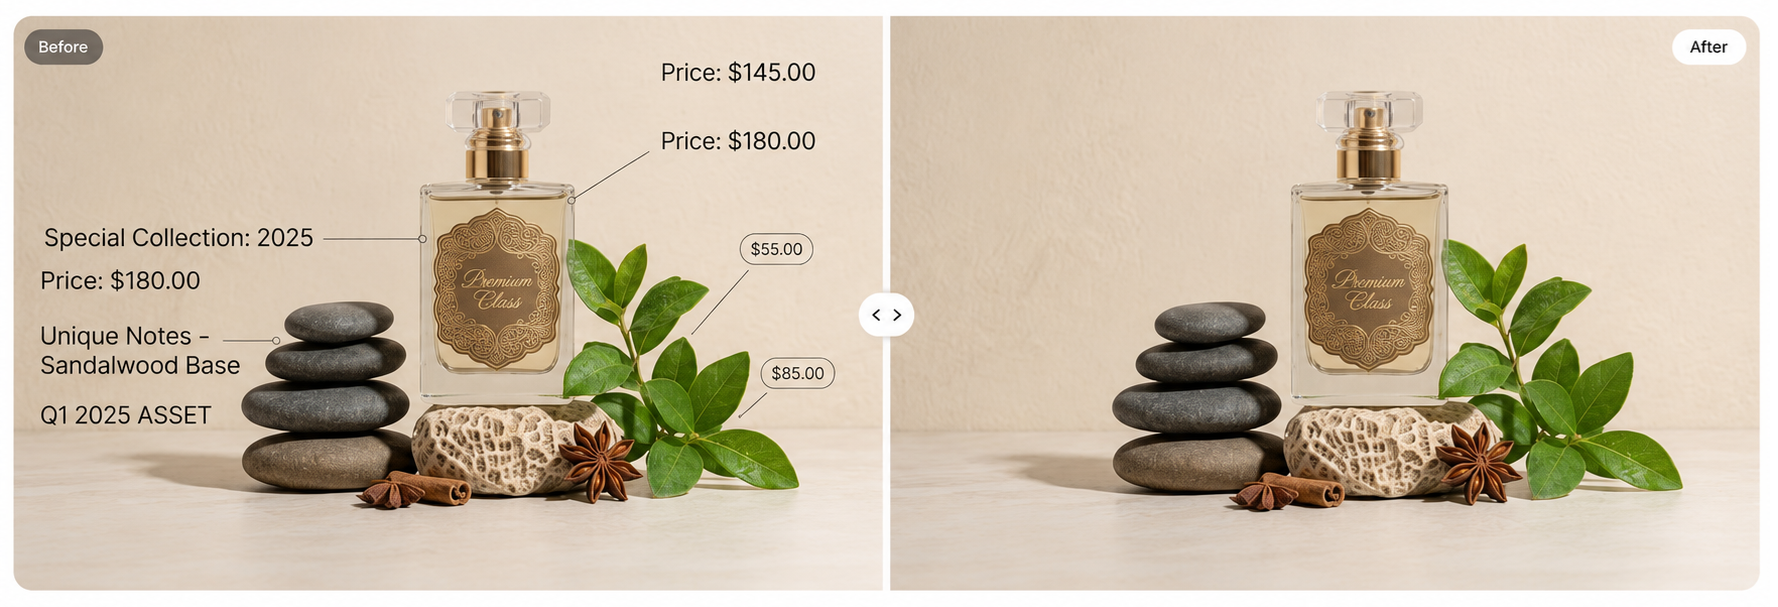 We tested this on repurposed ad footage with baked-in price overlays and campaign copy. The mode found the text regions, erased them, and reconstructed the background underneath without leaving the smeared or blurred patch you typically get from inpainting tools. For teams recycling assets across multiple campaigns, this saves a reshoot conversation.
2. Remove Subtitles
 Burned-in subtitles are one of the more stubborn problems in post, and we threw both fixed and scrolling captions at this mode. The main subject stayed intact across the removal, and there was no ghosting at the subtitle position on the clips we exported. The result was clean enough to hand off for a fresh localization pass without anyone flagging artifacts in review.
3. Remove Person
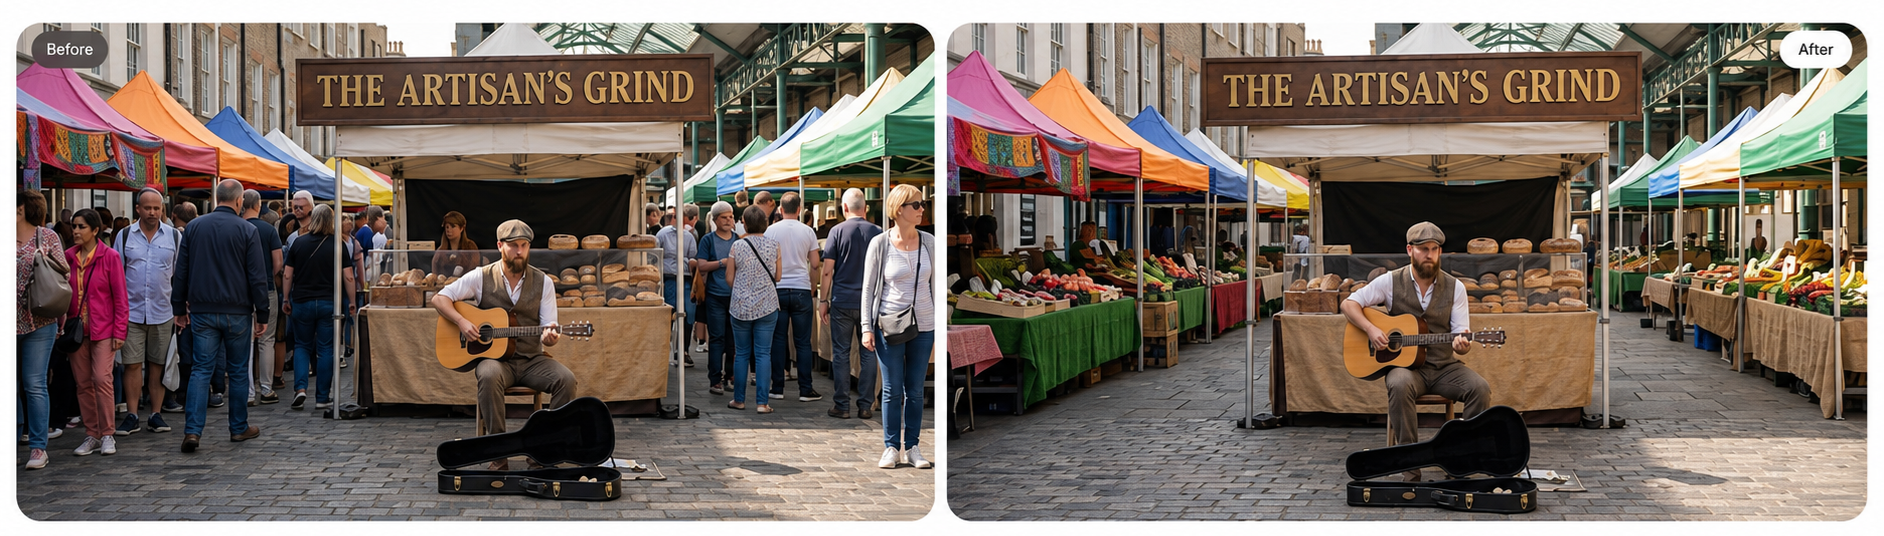 We used a walk-through music clip with background foot traffic throughout. The mode identified and removed the background figures, then reconstructed the scene behind them. Lighting consistency held reasonably well on static shots. On clips with faster movement, the reconstruction occasionally showed a slight softness in the filled region, but nothing that required manual correction to be usable.
4. Remove Object
 We tested this on a product shoot with a distracting prop left in frame and a separate clip with continuity errors between takes. Both cleared cleanly, with the surrounding material texture carrying through into the filled area. The tool clearly prioritizes keeping the fill visually consistent with adjacent surfaces rather than just flooding the region with a color average, and it shows in the output.
5. Remove Complex Watermarks
 This was the test we were most skeptical about going in. We ran clips with moving TikTok watermarks, Kling generator branding, and a tiled overlay that covered a significant portion of the frame. The auto-detection picked up the watermark boundaries without any manual selection, and the removal tracked the motion across the full clip length.
Stacked layers took slightly longer to process, but the output on all three clips was clean. This is genuinely the hardest category to get right on moving footage, and Vmake handles it better than we expected at this price point.
Other Features of Vmake
Beyond the enhancer, and remover the suite also includes:
- UGC video generator with dedicated tools for AI avatar video, product showcase, hook generation, and video recreation
- Auto caption generation with 100+ language support
- AI background remover with green screen output
- AI video generation via Seedance 2.0, Sora 2, Veo 3.1, Kling O1, and Kling 3.0 (Pro-only models)
- AI image generation via Nano Banana, Seedream 4.0, and GPT Image 1
Who Is Vmake Best For?
After spending time with the platform, I think Vmake serves a specific audience particularly well.
| Great For | Less Suitable For |
| Content creators | Professional film restoration projects |
| Social media managers | Advanced video editors |
| E-commerce businesses | Users requiring detailed manual controls |
| Marketing teams | Studio-level post-production workflows |
| Small business owners | |
| Influencers | |
| If your primary goal is creating cleaner, better-looking content quickly, Vmake fits naturally into that workflow. | |
Verdict: Is It Really Worth $9.99/Month?
Vmake is built around a specific idea: fast, cloud-based video enhancement. After testing Vmake’s core tools, we understand why the platform continues to attract creators and businesses looking for faster content workflows. It is not trying to compete with heavy desktop editors that run deep timelines, node-based grading, or frame-level manual restoration. The focus stays on speed. Upload, process, export. That simplicity shows up in how the entire platform behaves, from enhancement to cleanup tools.
At $9.99 a month, Vmake sits in a bracket where the price is low enough that the question almost answers itself. If even one of its core tools saves you a reshoot, a manual frame-by-frame edit session, or a separate subscription to another single-purpose tool, it has already paid for the month.